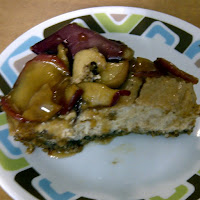
I've made this recipe a total of three times, and every time I make it, I play with the toppings. I've used apples in the fall, raspberries and strawberries and my latest was blackberries and strawberries.
 |
| How delicious does this look? Untouched and ready to be eaten. |
Ingredients
Crust
3 cups pecans (2.5 if chopped)
4 tbsp white sugar
3 tbsp whole wheat flour
6 tbsp melted margarine
Filling
1 package firm (or extra firm) tofu, rinsed
2 tubs tofutti cream cheese
2 tbsp soy milk (or other varieties)
2 tbsp lemon juice
1 tbsp vanilla extract
1/3 cup brown sugar, packed
1 tsp cinnamon (optional)
5 tbsp whole wheat flour
Topping
2 tbsp margarine
3 cups fruit, such as mixed berries (see photos for more information)
1 cup brown sugar, packed
1/4 cup corn starch dissolved in 1/4 cup cold water
Preparation
Crust
Preheat the oven to 400°F.
In a blender or food processor, pulse pecans, sugar and flour until crumbly (this can be challenging if using a blender, and may take some patience and frequent stirring).
Stir in melted margarine with a fork until well mixed.
Poor mixture into a 9" spring form pan and press down firmly with a fork or spatula, distributing the mixture evenly to about 1/4 inch thick.
If you are using a smaller spring form pan, you may want to consider continuing the crust up the sides of the pan.
Bake crust at 400°F for 13 minutes.
Let crust cool at room temperature for 5-15 minutes.
Reduce oven heat to 325°F.
 |
| McIntosh apples (3 sliced)! I didn't have a spring form pan at the time, so I used a large pie plate instead. |
Filling
In a medium mixing bowl, crumble tofu, and add all other ingredients.
Mix together roughly, then transfer to the food processor or blender, or use an immersion blender, and blend until smooth.
Spread the filling evenly onto the crust.
Bake at 325°F for 70 minutes.
After 70 minutes, turn the oven off, leaving the cheesecake in the oven for an additional hour.
Remove from the oven and let cool to room temperature on a wire rack before cooling in the fridge.
Let chill for at least an hour before making the topping.
Topping
Wash fruit and slice to desired thickness or leave smaller berries whole.
On medium low heat, melt margarine and toss with firmer fruit. Sauté for a few minutes, until tender, before adding any additional softer fruit.
When the fruit are at the desired tenderness, and they have produced a good amount of liquid, stir in the brown sugar and cook on medium low until bubbly, stirring lightly when needed.
Add the corn starch-water mixture and stir constantly until thickened.
Remove from heat and let cool slightly.
Top cheesecake with topping and let chill in the fridge for at least 2 hours. The longer it chills, the firmer it will become.
And if ever short on time, you can always switch between the fridge and the freezer when chilling this delicious cheese cake...I've never been a very patient person when it comes to cake.
Enjoy!


No comments:
Post a Comment