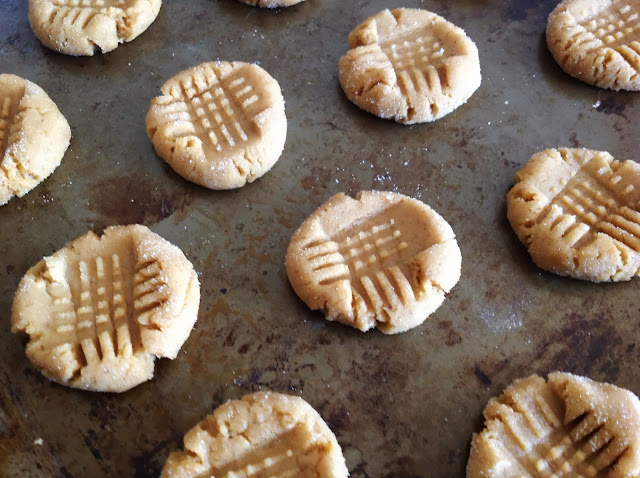
Showing posts with label sweet. Show all posts

Tuesday, 30 June 2015

Tofu Chocolate Pudding

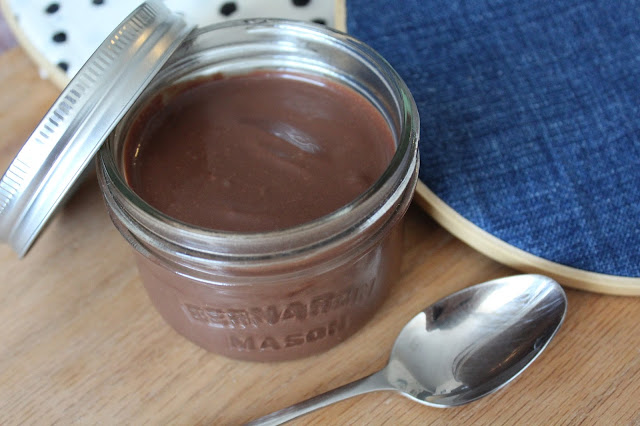
     Chocolate heaven. As much as I love greens, and boy have I been getting a lot of them lately with my CSA from Rye's HomeGrown, it's always nice to escape the jungle that is my fridge with a smooth and decadent chocolate delight. I initially created this recipe for a food demo for one of my nutrition classes, aimed at getting vegetarian children to eat more protein, considering the nut-free policy of most elementary schools these days. And based on the reviews I received, you'll love this pudding and so will your children (or anyone else's children). Because tofu is so dull it takes on whatever flavours you add it to, in this case it just tastes like chocolate, which makes me very happy. 


     I've tried a couple different ways of making tofu chocolate pudding. Making it with just cocoa powder isn't quite decadent enough, not enough fat. I found that when I used just chocolate chips, it was a bit too fatty. Or perhaps I just felt guilty using that much chocolate chips. Either way, I find that using a combination of chocolate chips and dutch cocoa powder is just perfect. 


     This recipe is rather simple compared to dairy based chocolate puddings, the hardest thing you'll have to do is melt some chocolate, which can either be done with in a double boiler, or if you are lazy like I often am, you can even do it in the microwave. 

Time: 15min (+1h)
Serves: 4-6

Ingredients

  • 1 package silken or soft tofu, drained
  • 2/3 cup (120g) semi-sweet chocolate chips or quality dark chocolate
  • ¼ cup (30g) cocoa powder, unsweetened
  • ¼ cup maple syrup
  • ¼ cup water
  • 1 Tbsp soy milk

Preparation

  1. In a double boiler or a large glass bowl over a pot of boiling water, melt chocolate with cocoa powder, maple syrup, water, and soy milk, stirring regularly.
  2. Meanwhile blend silken or soft tofu in blender until smooth, alternatively this can also be done with an immersion blender.
  3. When the tofu is smooth and the chocolate mixture is melted, add the chocolate to the tofu in the blender, and blend on low to combine.
  4. Transfer to a storage container or serving bowls, and refrigerate for at least one hour before serving.
  5. Serve with fresh raspberries and coconut or shaved chocolate.
Try serving it with raspberries and fresh shaved coconut, it's a delicious combination!

Friday, 6 February 2015

Vegan Dark Chocolate Beetroot Cake

     February sixth has come again, which means that Ryan's another year older. I was thinking of making Ryan a lemon poppy seed cake, but he decided that he wanted a chocolate beetroot cake. So here is my recipe! It's light and fudgy and absolutely delicious.


     I tried to look up a vegan recipe online but there weren't really any that suited our needs. Don't get me wrong, there are a couple out there, but there where a couple things I needed to have in this cake, like espresso (Ryan's request), boiled beetroot rather than roasted so that I could use the water for the liquid in the recipe, and a light but fudgy product. So, I used my favourite chocolate cake recipe, and umphed it up with some luscious beet purée and a long shot of espresso... as well as a couple other changes to try and get the right texture and moisture content. 


     This cake turned out wonderfully! Ryan couldn't believe how moist but fluffy this cake was. Moist chocolaty goodness, why not? I've also paired the cake with a poppy seed butter cream, a fun spin off of the usual, but nothing to flavourful so that it doesn't outshine the cake.


Serves: 6-10
Time: 30 minutes prep, 30-45 minutes cook

Ingredients


  • 4 medium beets, about 400 g, trimmed, peeled and cut into 2" pieces
  • 1 1/2 cup granulated white sugar
  • 1/2 cup unsweetened cocoa powder
  • 2 cups all-purpose-flour
  • 1 1/2 tsp baking soda
  • 1/2 tsp baking powder
  • 1/4 tsp salt 
  • 1 cup beet water, or water
  • 1 long espresso (2-4 Tbsp)
  • 1/2 canola oil
  • 2 tsp vanilla extract
Poppy Seed Butter Cream
  • 1/2 cup vegan margarine
  • 1 Tbsp vanilla extract
  • 2 cups powdered/confectioners sugar
  • 2 Tbsp soy milk
  • 2 - 3 Tbsp poppy seeds

Preparation
  1. Preheat the oven to 350°F.
  2. Wash, trim and peel beetroot (you might want to wear some gloves). Cut into 2" pieces. Place in a medium pot, rinse once, and then cover with about 2" of water. Bring to a boil. Reduce heat and simmer until tender (they should be easily pierced with a fork), about 30 minutes. Check water level every ten minutes, and top up with a bit of water if too much boils off.
  3. Poor beet water into a glass measuring cup, keep one (1) cup, and discard the rest, or of there is less than a cup, top it up with warm water.
  4. Purée beetroots with a food processor or an immersion blender. As much as I love my food processor, beets are a bit messy so I tend to choose the stick blender for this task.
  5. In a large mixing bowl, whisk together all the dry ingredients: flour, sugar, cocoa, leavening agents and salt.
  6. While whisking, slowly add in the wet ingredients: beet purée, beet water, espresso, canola oil and vanilla extract. Mix well until smooth.
  7. Lightly grease your baking pans, either two 9" round baking pans or a bunt pan, and if possible, also line with parchment paper.
  8. If using the two round pans, equally distribute the batter between them. On a flat surface, bang the pans a couple of times, and then swirl or spin so that there is more batter around the edges of the cake pan than the center. This will help you get flatter cakes rather than really rounded cakes.
  9. Bake in the oven at 350°F for 30-35 minutes (two pans) or 40-45 minutes (bunt pan).
  10. Lick spoon (it's tasty. Seriously).
  11. When done baking, you should be able to pierce the center of the cake with a tooth pick or a knife and have it come out clean. 
  12. Let cool on a wire rack in the cake pans for 30 minutes, then delicately remove from the cake pans, and let cool an additional 30 minutes, still on wire rack, before icing or glazing.
  13. To make the poppy seed butter cream, whisk together the margarine with the vanilla extract, then slowly whisk in the powdered sugar. Then whisk in the soy milk and the poppy seeds, you can use a little or less soy milk to achieve your desired texture. This can be done by hand, or using an electric mixer, your preference.
  14. Ice and enjoy.


Wednesday, 24 December 2014

Chewy Ginger Molasses Cookies

     Christmas eve baking anyone? Why not some super moist ginger molasses cookies? 
I baked up a batch of these yesterday, along with a myriad of other goodies, and the house smelled wonderful! These molasses cookies have all the zestfulness they need, with all the chewiness you want. They are made with fresh ginger which really gives them a surprising zing and a real freshness. 


     There's really not much more I can say about these cookies. They're delicious, they stay soft and chewy for days, and I always eat them way too fast. I suggest making a double batch.


Serves: 24 cookies

Ingredients

  • 2 cups of flour
  • 1 tsp baking powder
  • 1 tsp baking soda
  • 1 1/2 tsp ginger powder
  • 1 tsp cinnamon
  • 1/2 tsp nutmeg
  • 1/2 cup margarine
  • 3/4 cup white sugar
  • 1/2 cup molasses
  • 1 Tbsp fresh grated ginger, packed + 1 Tbsp water


Preparation

  1. Preheat the oven to 350°F and prepare a large baking sheet with parchment paper.
  2. In a large mixing bowl, mix together flour, baking powder and baking soda, and spices.
  3. In a small mixing bowl, cream together the margarine, sugar, molasses, ginger and water.
  4. Slowly incorporate the wet mixture into the dry until you've formed a crumbly mixture.
  5. Spoon out packed tablespoon-size portions of cookie dough and roll into balls.
  6. Roll the balls in sugar and place on your baking sheet.
  7. Bake for 10-15 minutes, remove from the oven and let cool for 5 minutes on the baking sheet before transferring to a wire rack.
Enjoy with a warm beverage next to warm fire (dreaming just a bit).

Wednesday, 7 May 2014

Chocolate Lover's Brownie Cookies

     Lovers of anything chocolate beware. These fudgy brownie cookies are addictive. Soft, gooey and oh so chocolaty.


     After what seemed to have been the longest exam period in history, I am finally free. Well relatively speaking. I'm still working at the pool, teaching kiddies how to swim, volunteering at the hospital and taking summer school. But overall, I have much more time to do things that I want (like build another book shelf and create some new recipes). So to celebrate my freedom, I made some cookies.

     These cookies are supper moist. When you take them out of the oven they look undercooked. But by leaving them on the hot baking sheet for a few more minutes, you are firming up the bottom so they don't fall apart while allowing them to stay moist and gooey in the center, just like a brownie cookie should be.

Serves: about 36 cookies


Ingredients

1 cup margarine
1 cup brown sugar, packed
1/2 cup granulated sugar
1/4 cup water
1 tsp vanilla
2 1/4 cups all purpose flour
3/4 cup cocoa powder
1 tsp baking powder
1 tsp baking soda
1 cup semi-sweet dark chocolate chips (use 1 1/2 cups to make them extra chocolaty)


Preparation

1. Preheat the oven to 375°F.
2. In a medium bowl, beat margarine and sugar until fluffy, then beat in the water and vanilla.
3. In another bowl, mix flour, cocoa powder, baking soda and baking powder.
4. Stir dry mixture into the wet, until well combined, then stir  in chocolate chips.
5. Use a cookie scooper or roll dough into golf ball size balls (1 1/2" in diameter). Place balls onto an ungreased cookie sheet and either slightly compress the dough balls or leave round (the more round the gooeyer).
6. Bake in the center of the oven for 8-10 minutes, remove and let cool on the cookie sheet for 1-5 minutes before transferring the cookie onto a wire rack to cool completely.

Sunday, 9 February 2014

Vegan Oreo Cheesecake

It was Ryan's birthday last week and we wanted to try out making something new. After I was done my exam, I ran to the grocery store, picked up some tofutti, some Oreos and all the other necessities to make one tasty Oreo cheesecake. I love using tofu in cheesecakes, mostly because it makes me feel like I am way healthier than I am. The cake is much lighter than one would expect and because it has all that heart-healthy protein, I don't feel bad about eating cheese cake for breakfast 2 days in a row.  
My oven is not the greatest. It's old and has a stupid knob to choose between using the top or bottom element.
A normal person would remember to put the oven on bake....but I forgot. So the top is bit darker than expected,
but still ridiculously delicious! 
I've used classic Oreos, but you could use any chocolate sandwich cookie. I've made this recipe so that it uses an entire bag of cookies, about 26, but if you only have 24 cookies its not the end of the world, just take away one or two from the crust or filling.
I've also used coconut oil in this recipe. It is not an ingredient that I use that often, mostly because it is easier and cheaper to use margarine, but coconut oil works great here. Because coconut oil solidifies around room temperature, you get a solid crust. Coconut oil, although it is a saturated fat, is one of the healthiest sat-fats because it is composed of short chain saturated fatty acids, which our body doesn't digest the same way as lard or butter. But, if you don't have coconut oil*, you can substitute the coconut oil with margarine and add 2 Tbsp of flour to help bind the crust. 

Ingredients


Crust
18 Oreos, crushed into crumbs or crumbled 
3 tbsp melted coconut oil (*See note above if you don't have coconut oil)

Filling
Last time I made cheesecake I broke my spingform pan, so
this time I ended up using a cake pan. To avoid scratching up
my pan, I lines it with parchment. The little pieces of paper
sticking out were just there to help us hold down the
parchment paper when we were spreading out the crust.
Looks pretty good though, doesn't it?
1 package firm (or extra firm) tofu, rinsed and squeezed out
2 tubs tofutti cream cheese 
2 tbsp soy milk (or other varieties)
1 tbsp lemon juice
2 tsp vanilla extract
pinch of salt
Scant 1/2 cup white sugar
4 tbsp flour

4 Oreos, chopped or crushed into medium pieces

Topping
4 Oreos, chopped or crushed into medium pieces

Preparation

Crust
In a  food processor, pulse Oreos, or alternatively, seal Oreos in a freezer bag and crush finely with a rolling pin.
In a medium bowl, stir together melted coconut oil and Oreo crumbs with a fork until well mixed.
Poor mixture into a 9" spring form pan (or pie plate) and press down firmly with a fork or spatula, distributing the mixture evenly to about 1/4 inch thick. 

Preheat oven to 325°F.

Filling
In a medium mixing bowl, crumble tofu, and add all other ingredients for the filling, other than the Oreos.
Mix together roughly, then use an immersion blender or transfer the mixture to the food processor or blender, and blend until smooth.
Spread the filling evenly onto the crust.


Topping
Sprinkle the chopped or crushed Oreos evenly on the top of the filling. Lightly push the Oreo peices into the filling, just slightly so they don't fall off while serving.
Bake at 325°F for 70 minutes.
After 70 minutes, turn the oven off, leaving the cheesecake in the oven for an additional hour.
Remove from the oven and let cool to room temperature on a wire rack before cooling in the fridge.
Let chill for at least an hour before serving.

Enjoy!

Wednesday, 11 September 2013

Peanut Butter Cups

School's back in session and we can all use a mid-week pick-me-up, so behold: chocolate peanut butter cups. If you've had Reese's peanut butter cups, you know what to expect. But these tasty cups may exceed you expectations. 
I make my peanut butter cups with dark chocolate chip, but feel free to use any chocolate you wish. As for the peanut butter, use natural peanut butter, or a similar product without all the added sugar which can make your peanut butter cups cloyingly sweet.


Makes: 12 cups (so make sure you've got 12 paper muffin cups on hand)


Ingredients


1 cup creamy natural peanut butter
1/2 icing sugar
1 1/2 cup chocolate chips
1/8 tsp salt (optional, but makes them taste better)


Preparation


Melt chocolate chips either on low heat on the stove top or in a microwave.
Spread half the melted chocolate evenly around the sides and the bottom of the 12 muffin cups. I find this can be done easily with a small spoon if you hold the muffin cup in you hand and spin it while spreading the chocolate around.
Place the paper muffin cups in a muffin pan and place in the freezer for a minimum of 20 minutes.
While the chocolate is hardening  in a small bowl cream the peanut butter with the sugar (can be sifted to avoid sugar chunks, unless you are too lazy like me) and salt. If the mixture is a bit stiff due to stiff peanut butter, you can add a dollop of margarine to the mixture.
In hardened-chocolate cups, distribute the peanut butter mixture evenly, spreading it flat with a spoon or by banging the muffin pan on the counter.
Refreeze the peanut butter cups for about 20 more minutes before spreading on the top layer of chocolate.
After all the chocolate has been smoothed out, refreeze the peanut butter cups for 1 hour.
Store in the freezer afterwards and let them thaw for a few minutes before nibbling.
Enjoy!


Thursday, 27 June 2013

Peanut Butter Cookies

 It's been a very long time since I've had peanut butter cookies, probably since before I left home. But for some reason, I've always remembered peanut butter cookies being on the harder side of the cookie scale.  Well not these ones. These peanut butter cookies are super moist and super delicious. 
Since these cookies are made with flax, they have the added benefits of omega-3 and omega-6 fatty acids. And essential fatty acids in my cookies means I can justify having a third.


Makes: 32 cookies

Ingredients


2 cups brown sugar, lightly packed
1 cup margarine
1 cup natural, smooth peanut butter (No sugar added)
6 tbsp water + 2 tbsp ground flax
1 tsp vanilla extract
3 cups of flour
1 tsp baking soda
1/2 salt
white sugar for dusting

Preparation


In a jar or measuring cup combine water and ground flax, let sit for at least 3 minutes until the mixture thickens.
Meanwhile, in a large mixing bowl, cream together brown sugar, margarine and peanut butter.
Stir in the water flax mixture and the vanilla.
Add the flour, baking soda and salt to the batter, and mix until well combined.
Cover with plastic wrap and let sit in the fridge for at least 2 hours.


Preheat oven to 350°F.
Remove the batter from the fridge, and form golf ball size balls.
Roll the batter balls in white sugar (optional). then place on a lightly greased baking sheet.
Place the dough balls a few inches apart, then squish down with a fork.
Bake at 350°F for 12 minutes.
Remove from the oven and let rest on the baking sheet for an additional 5 minutes before transferring to a wire rack.
Let cool completely before eating.


Tuesday, 25 June 2013

Southern Comfort Food


I absolutely love comfort food! A few nights ago, we whipped up a batch of mac 'n' cheese with some garlic collard greens, sweet potato mash, vegetarian chicken fingers (store bought) and some tasty biscuits.
We've made mac 'n' cheese many times, however the recipe below is are go-to. It's rich and creamy, and really easy to make. As for the collard greens, the trick, as we've found, is to steam them, then quickly sautée in warm oil with garlic.
This meal is perfect for when you're having a craving for southern dinner food. All the goodness, but without all the animal products and butter! Yum!


Mac 'n' Cheese

Serves: 4-6

Ingredients


1 pound or 450g of pasta, cooked al dente

1 1/2 cup water
3/4 cup plain soy milk, or dairy-free milk
3/4 cup nutritional yeast
3 tbsp cornstarch
1 tbsp lemon juice
1/2 tsp salt + more to taste
1/8 tsp garlic powder
1/8 tsp onion powder
1 tsp turmeric powder
ground black pepper to taste


Preparation


Put all ingredients in the blender and pulse until smooth.
Taste for seasoning.
In a large pan, on medium heat, add all the cooked pasta to the cheesey-cheeseless mixture.
Cook for 5 to 10 minutes until the mixture has thickened.
Serve immediately with fresh ground pepper and salt if needed.
Add the remaining uncooked sauce to any leftovers so that tomorrow's leftovers will be as creamy as tonight's.


Garlic Collard Greens

Serves: 3-4

Ingredients


1 large bunch of collard greens
olive oil, about 1/8 to 1/4cup, enough to well coat the bottom of your pan
4-5 cloves of garlic, minced or sliced
pinch of red chili flakes
salt to taste
1 tsp lemon juice

Preparation


In a large skillet, heat olive oil with the garlic and chili peppers on low heat for 10-15min.
Wash the collard greens and cut into 1" strips.
Steam all the collards in a steamer basket in a covered pot with an inch of water at the bottom.
Steam for about 5 minutes, until bright green then drain, trying to remove as much water as possible.
Toss the collards in the warm olive oil mixture and sautée on low for 3 minutes. 
Mix the collards with the lemon juice and serve.


Sweet Potato Mash

Serves: 4-6

Ingredients


4 medium-large sweet potatoes or garnite yams
3 cloves of garlic
water
1/4 tsp salt
1/4 cup molasses, or to taste
pinch of allspice or asian 5-spice
1/2 tbsp paprika
scant 1/4 cup margarine
salt and pepper to taste

Preparation


In a large covered pot, bring salted water to a boil. 
Wash the sweet potatoes and cut into 1" chunks. Husk and remove the ends of the garlic, keeping the cloves whole. Add the garlic and the sweet potatoes to the boiling water.
Boil for about 10 minutes or until the potatoes are soft enough to mash.
Reserve about a cup of the cooking liquid, and drain the rest.
In the pot, mash the sweet potatoes adding the spices, and the margarine and cooking water until a smooth texture is obtained. You may also use an immersion blender to quicken the process.
Season with salt and pepper and serve along side your mac'n'cheese, collards and biscuits.


Monday, 6 May 2013

Vegan Ice Cream (Without an Ice Cream Machine)

Vegan ice cream has always been a bit too expensive for use, and as students living in a small one bedroom apartment, an ice cream machine is not feasible nor is it worth the cupboard space. So, low and behold, I found a way to make vegan ice cream à la cheap and without a machine. 

Freeze time: ~3 hours
One messy bite away

Ingredients


1 can coconut milk, high fat
1 can's worth of soy milk,
1/2 cup sugar
1 tsp vanilla extract or 1 scraped vanilla bean
pinch of salt

Preparation


Refrigerate coconut milk overnight before using it.
Add all Ingredients into a medium-large plastic,freezer safe container and mix thoroughly either with a whisk or with an immersion blender. 
Place uncovered container of ice cream liquid in the freezer for 30 minutes.
Scrape the frozen ice cream from around the edges of the container and mix again thoroughly.

Continue freezing for 30 minutes, scraping and mixing, then repeating until frozen.

Best consumed while fresh, which is much softer. Alternatively, if left for several hours in the freezer, let thaw for at least 10 minutes before serving..

We made some delicious ice cream sandwiches with my chocolate chip recipe, modified with the addition of 1/3 cup of cocoa, while spreading the cookie batter out a bit thinner and removing them from the oven a minute early


Thursday, 4 April 2013

Sweet Iced Tea

Iced tea is one of the simplest and most delicious drinks you can make, at any time during the year. It's tasty and thirst-quenching and mixes well with liquor (if you feel so inclined). When we make it, we'll fill several jars in one go so that we have it on hand for the next week. Yes, it only seems to last a short while before you have to make more. But really, don't you have 5 minutes to spare?


The three smaller jars are our 1L mason jars, the extra large one is 2L and fits two pots of tea

Ingredients


1 L of water
1 1/2 tsp tea leaves or 3 tea bags
1/2 cup sugar
1/4 cup lemon juice


Preparation


Brew the tea as you normally would. I usually brew teas for 3 minutes maximum (unless it's herbal, in which case leave it as long as you like) and usually a little less if the tea is prone to bitter, such as white and green teas. Use fairly hot water for black tea, herbal, mate and rooibos, around 98° C. If you have a thermometer, you can use it now, but if not, just wait a minute after the kettle boils before pouring the tea in. For green and white tea, wait several minutes, until the water cools to around 74° C, and perhaps brew it for a little less than 3 minutes. About 1 L of water fits in a large, 3 cup teapot, which in turn fits in a large mason jar, the kind that pasta sauce often comes in.

Pour the brewed tea into the jar you will be storing it in, then add 1/2 cup sugar and 1/4 cup lemon juice. These measurements make a sweet-but-not-too-sweet iced tea, with a pleasant acidity. You can adjust the proportions to your taste.

Stir your concoction with a chopstick or other stirring utensil, then let it cool a bit.

Refrigerate until cool, which will take several hours. If you're in a rush, fill your glass with ice, then slowly pour the tea over it.

Drink up!